Getting a server
Introduction
Servers: You need one. Here’s how to get it.
How to get one
Create your account
We will use DigitalOcean for this tutorial, but the steps are largely the same for other providers.
Note: DigitalOcean provides a virtual server, which is different from owning a physical server. If you wish to own the underlying hardware, look into “data center colocation”, which is outside the scope of this article.
Create a project
Go to Project > New Project.
Fill out the information on the form. You do not need to provide environment type or purpose.
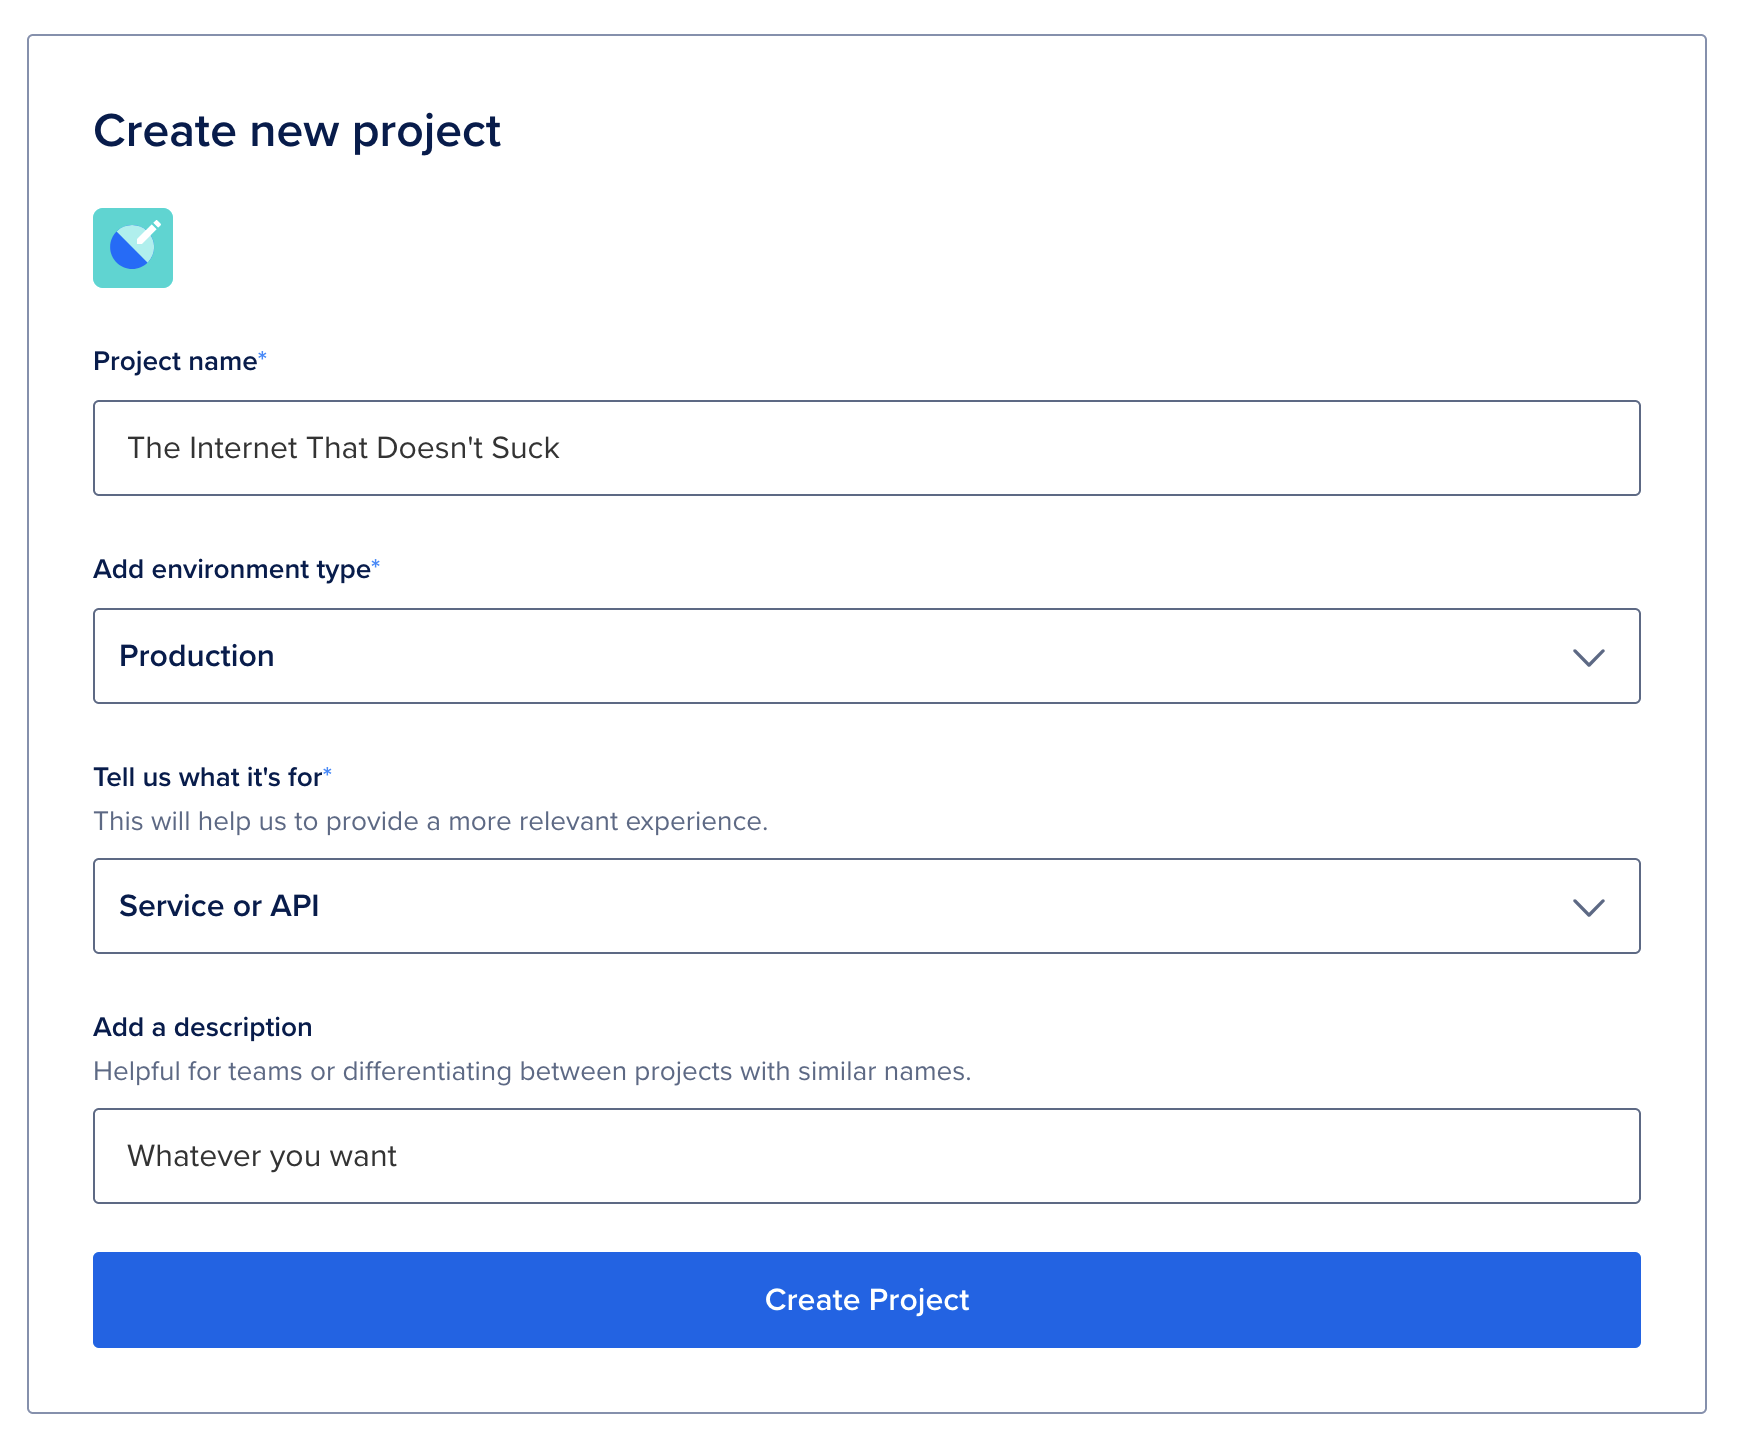
You do not need to assign resources to it for now. If you already have a virtual server set up on the account, you can move it over now.
If you make a mistake, you can delete this project from its Settings menu.
Create a Droplet
From the left-hand toolbar, select Manage > Droplets
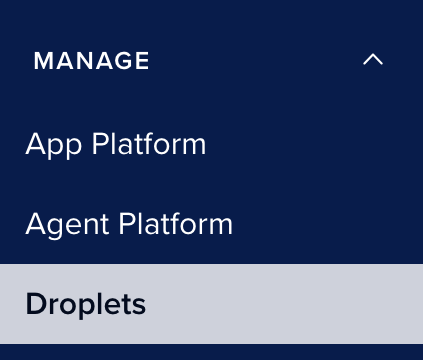
Click “Create Droplet”
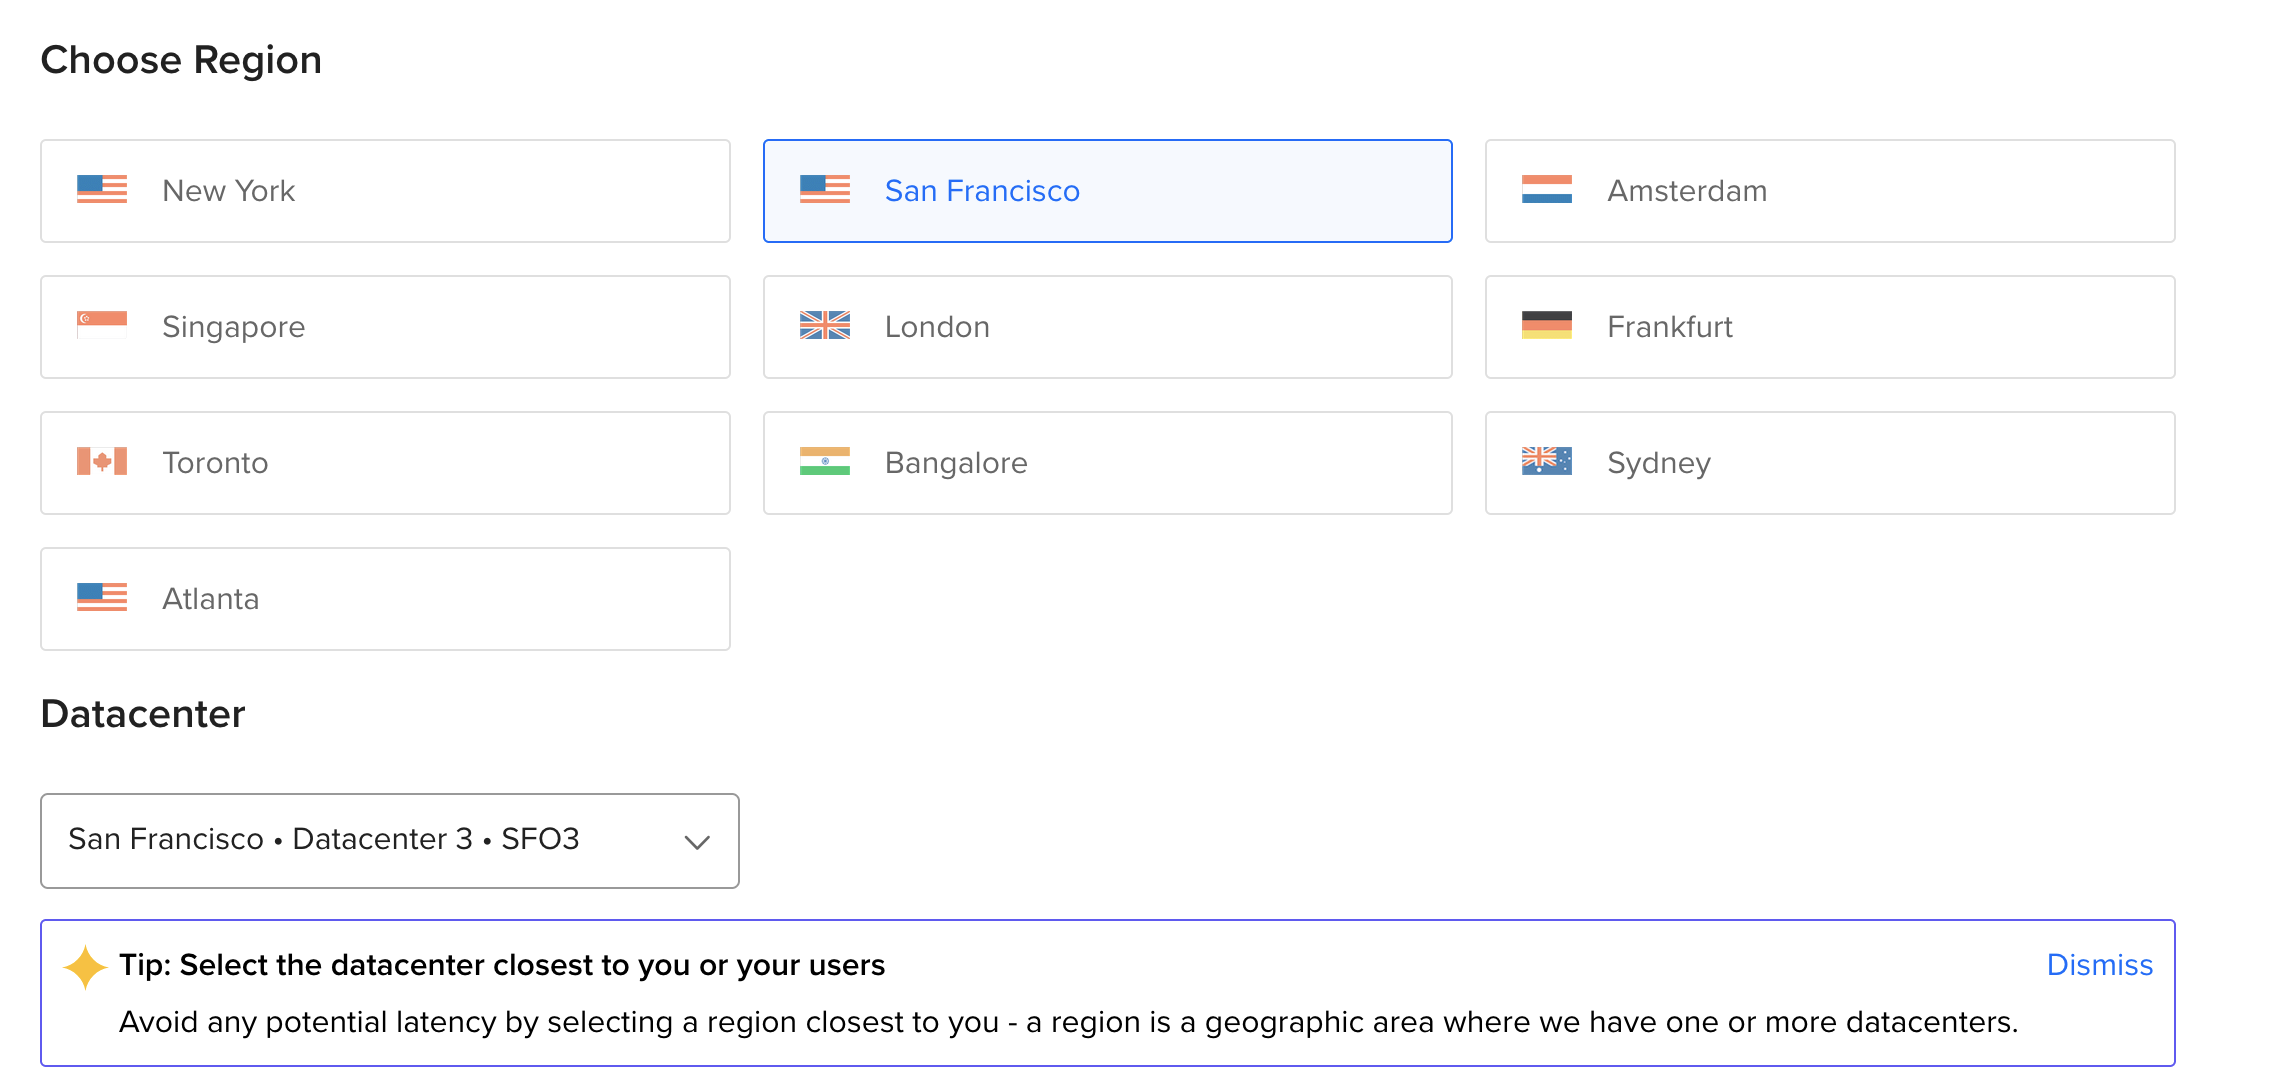
Choose a region for your droplet. This should be the city closest to whoever will be using the server, which is probably you. The exact datacenter does not matter, this setting is for large deployments.
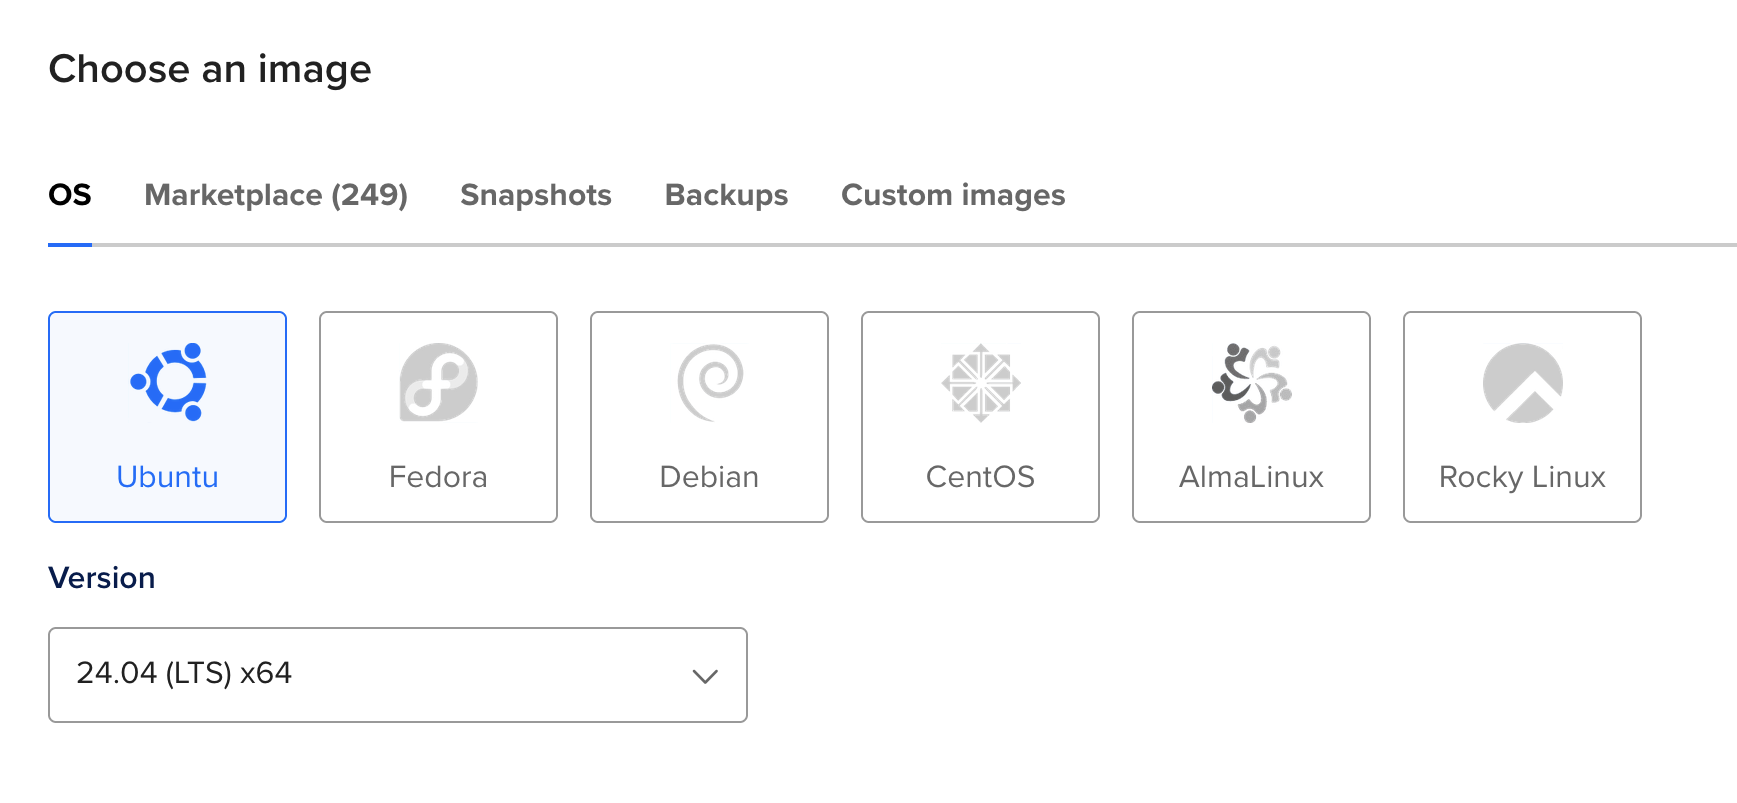
Choose an operating system. This should be the most recent version of Ubuntu labeled “LTS” (Long Term Support).
Choose a droplet size. You do not need beyond a regular CPU for any of these tutorials. What you need will vary according to your needs. You may need to scroll to see the cheapest option.
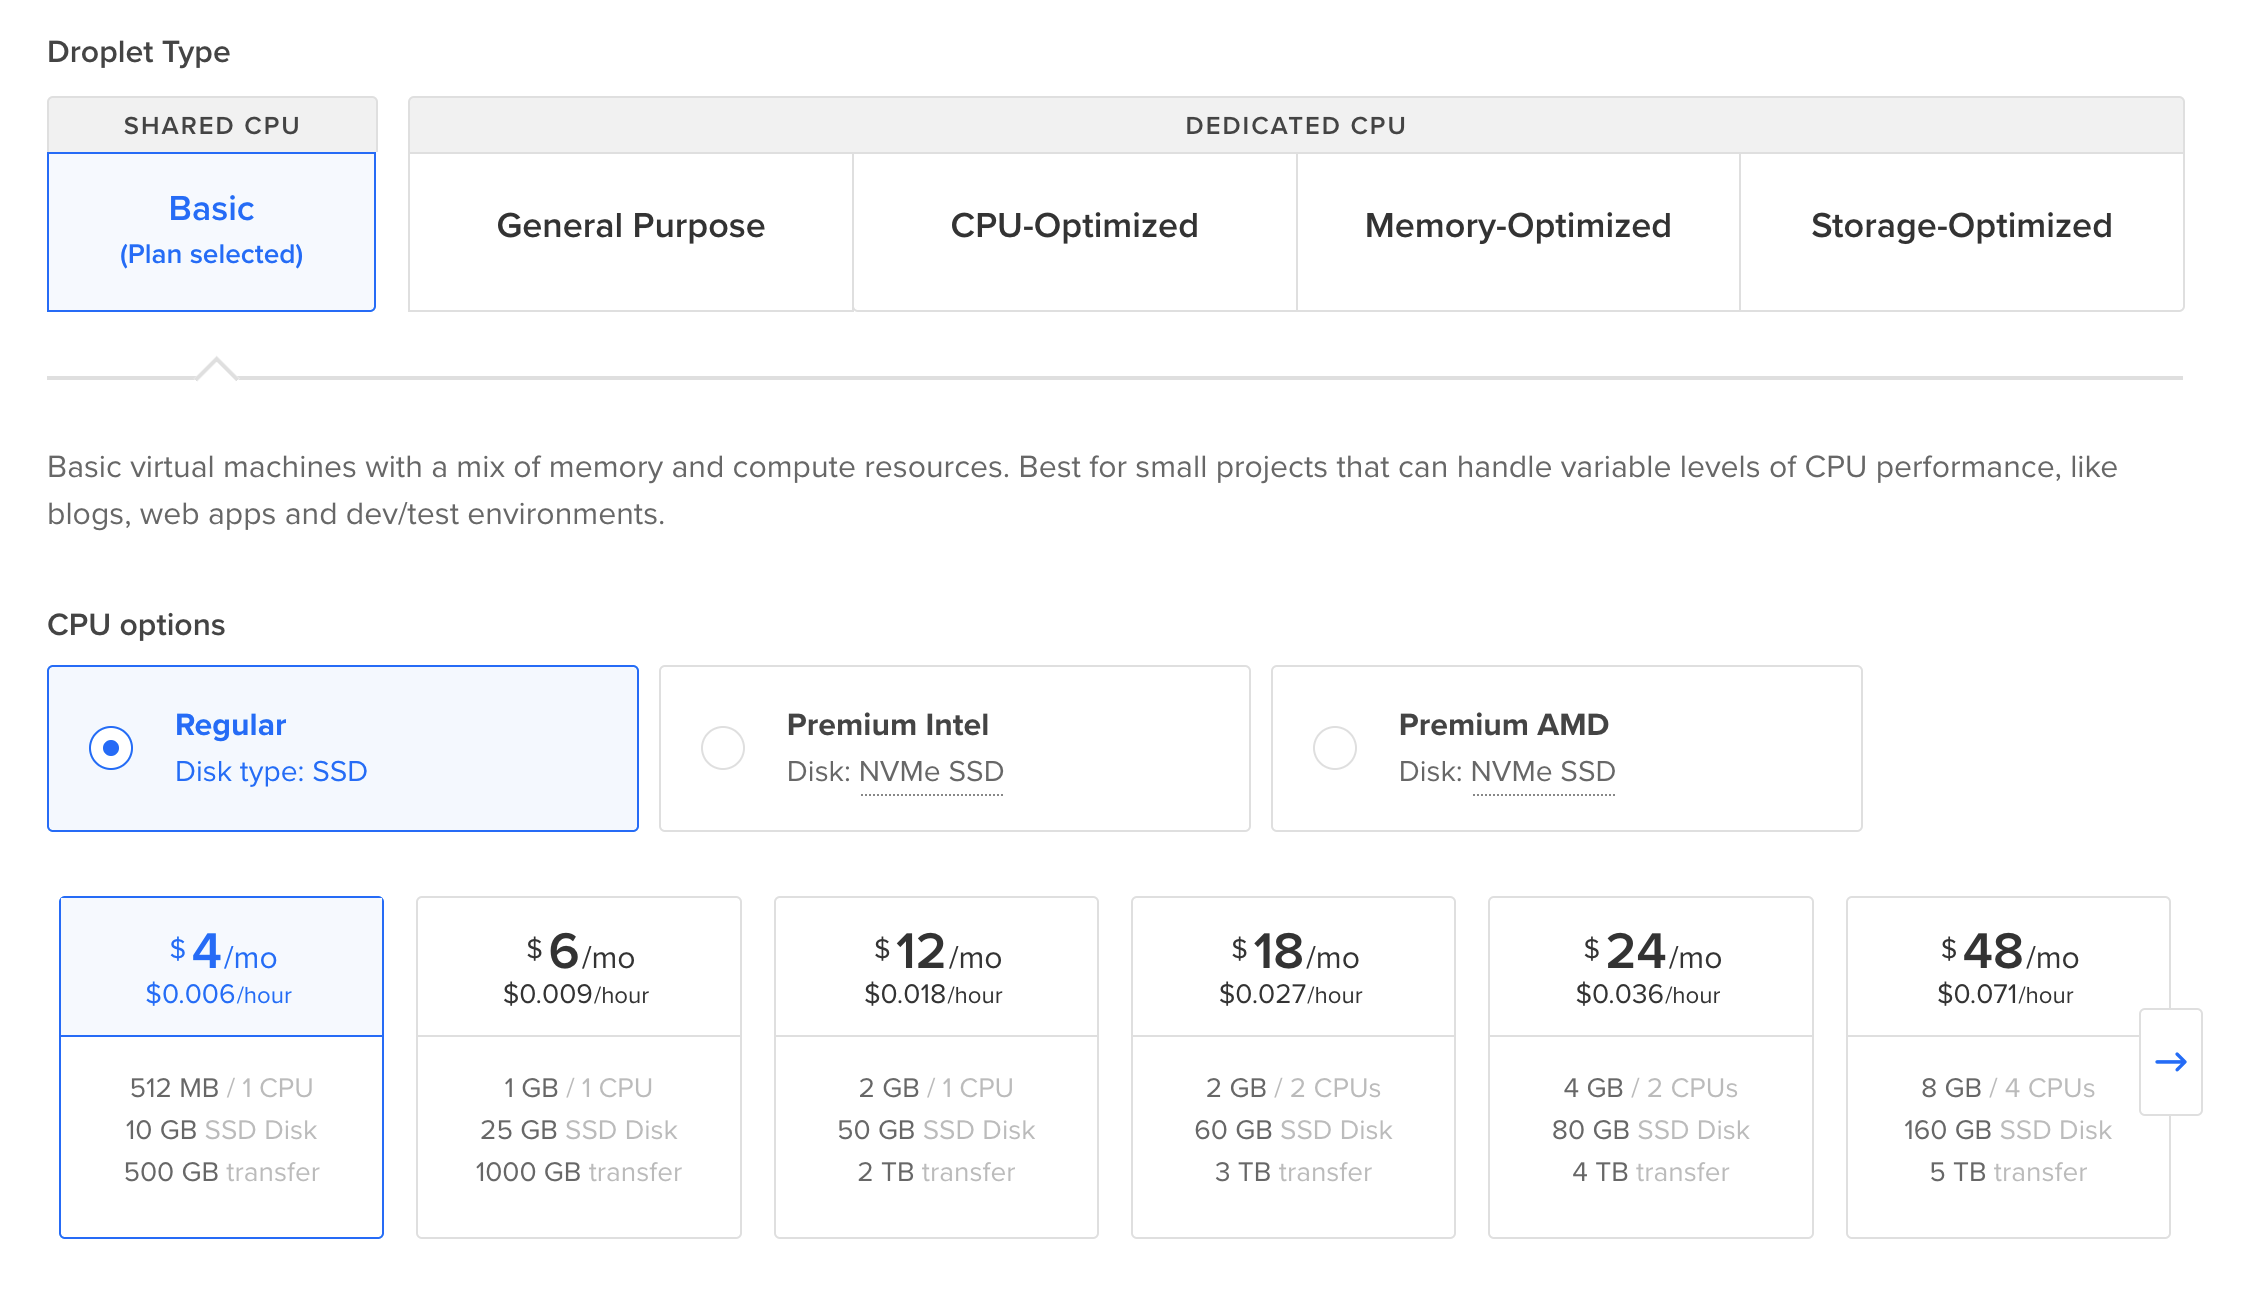
A Wordpress blog, or anything “heavy”, should start with at least 1GB of memory. An XMPP server is very light, and uses about 32MB of RAM.
- Add additional storage if you think you will need more than the provided amount of disk space on your server.
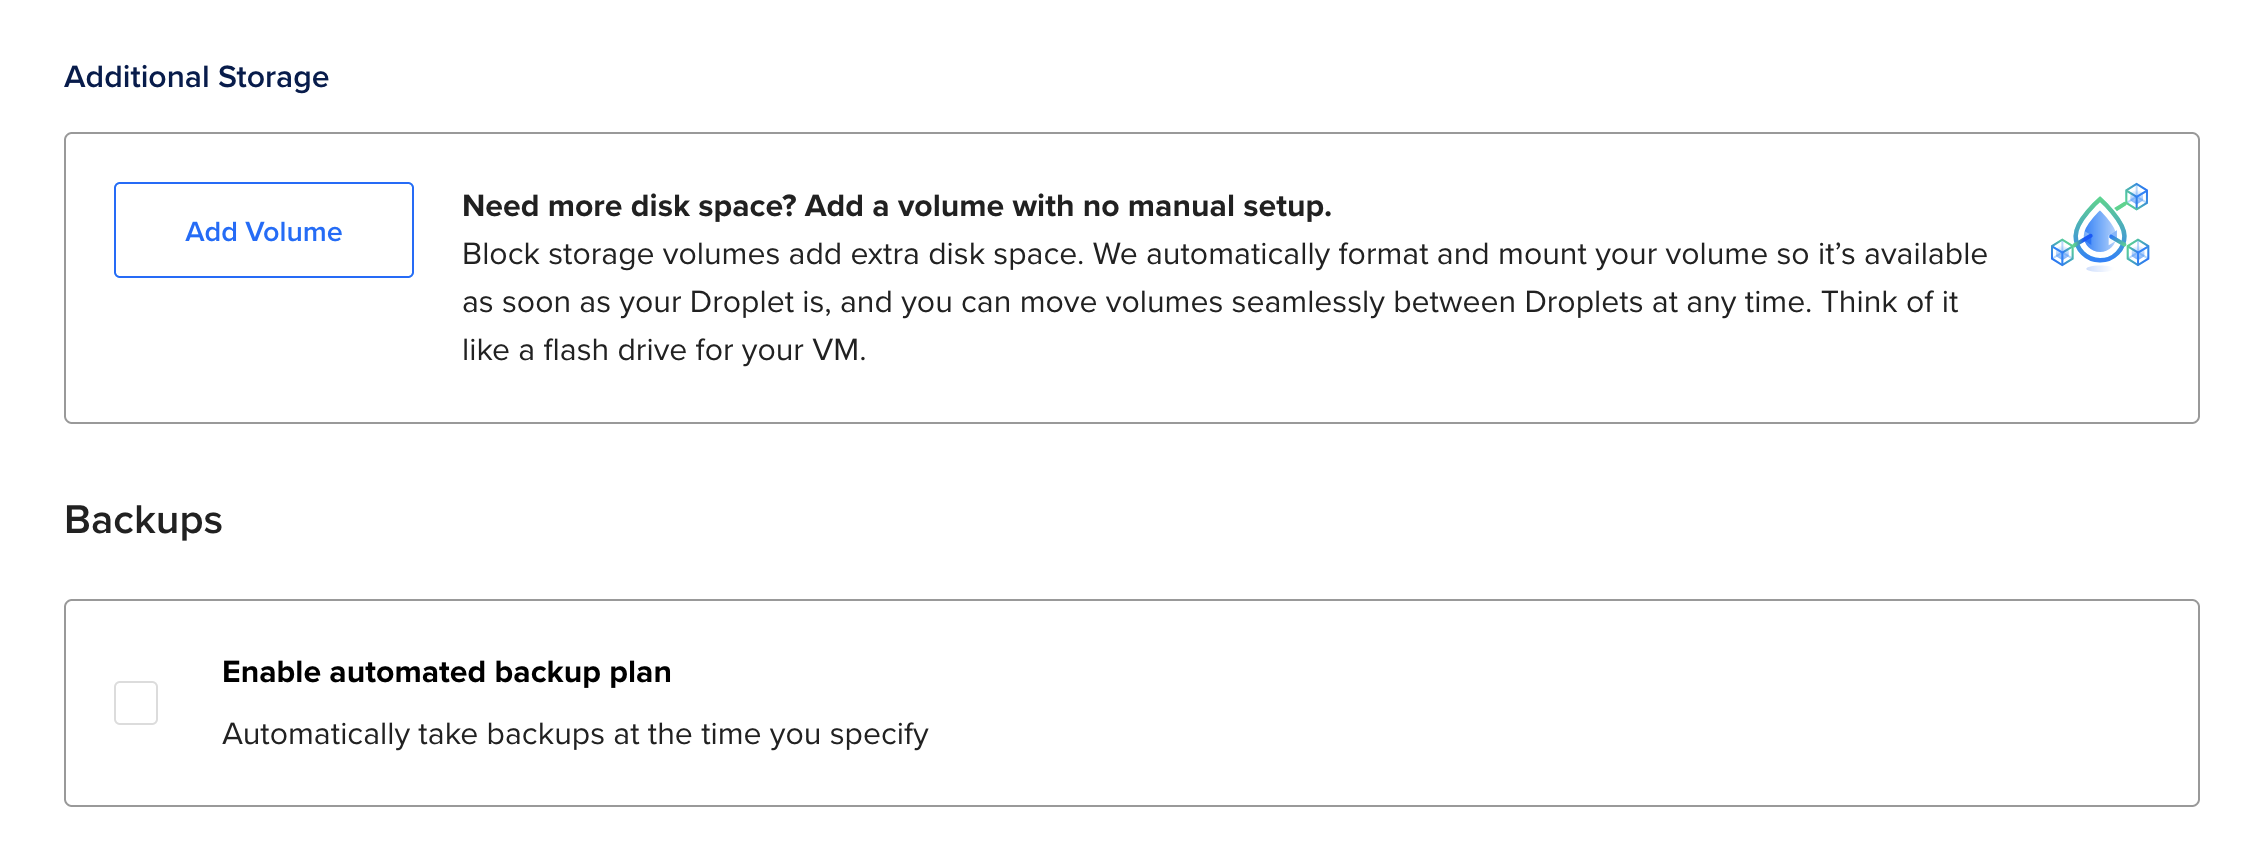
Storage on a Volume behaves exactly like a hard drive, and is ~$1 for 10GB.
If you need bulk storage for heavyweight files, you can look into some things called “block storage” and “object storage”. Using these technologies is a bit more work, but $1 will buy approximately 100GB.
Turn on backups if you’d like to keep around an automatic periodic snapshot of your machine for restoration. ~$1/month.
If you want extra security, select “SSH Key” as your login method. It will ask you for a public SSH key, which you can generate locally on your personal computer; there should be instructions provided on the page. If you would like a more detailed breakdown, check out our using SSH guide.
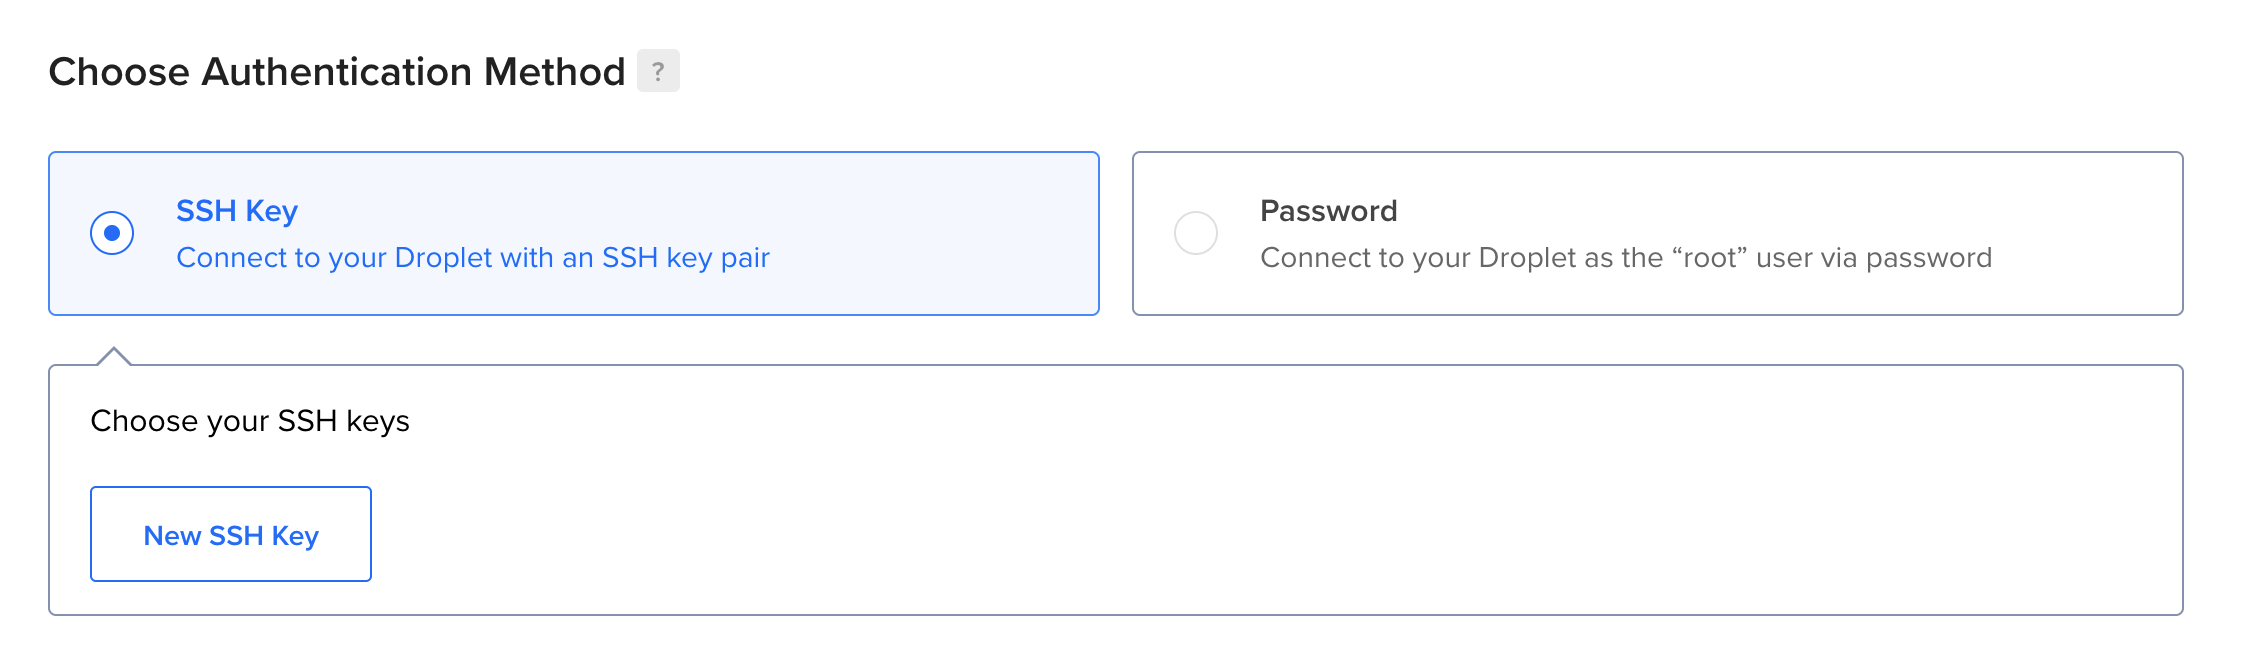
It is possible to use password-based authentication, but doing this now starts you off with something much more secure.
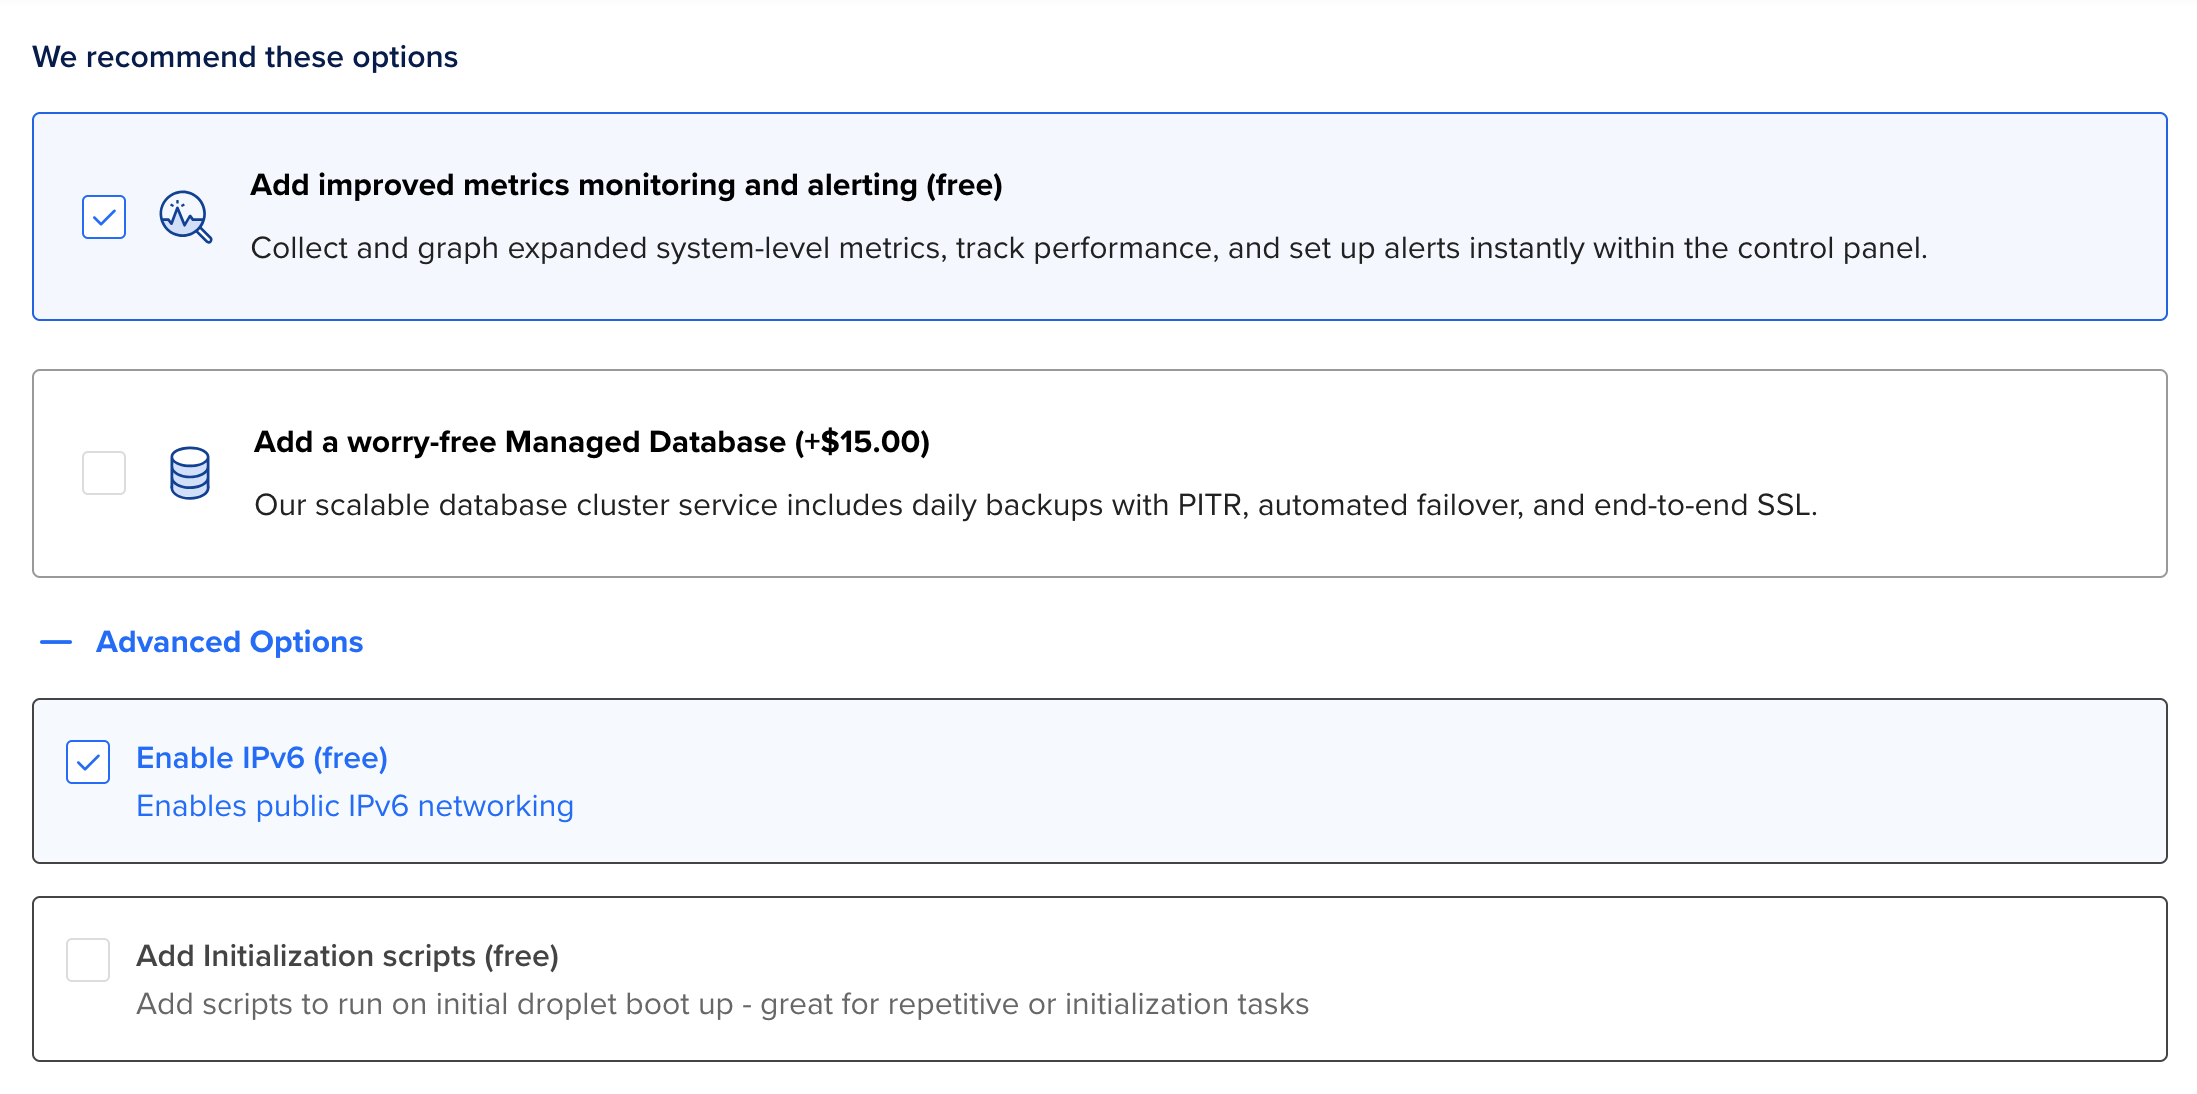
- Add metrics and IPv6 networking support. The metrics are useful, and using IPv6 helps make it easier for everyone to get ordinary IP addresses.
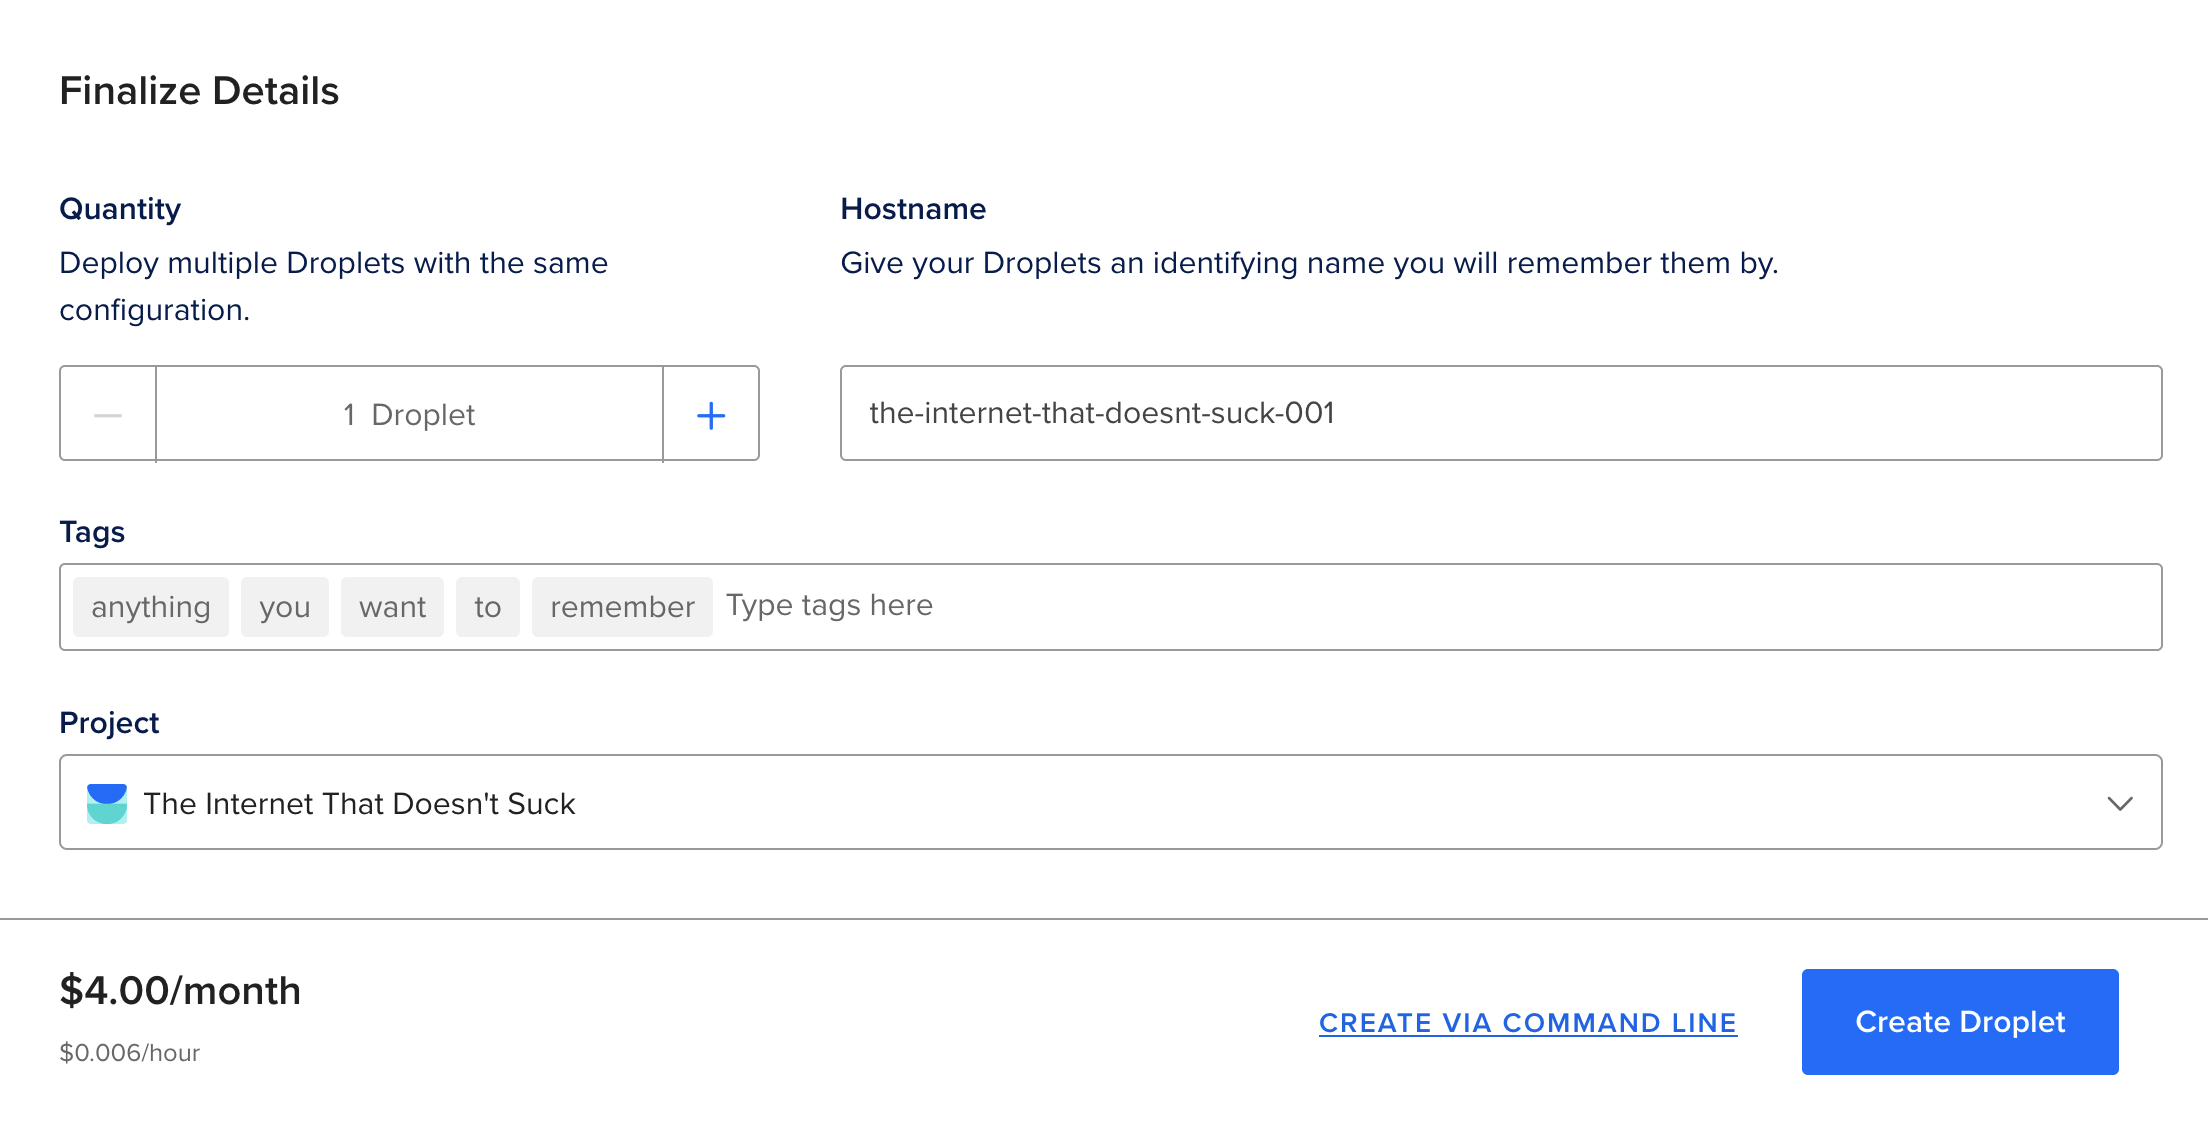
- Finalize the details. Make sure you’re only creating one droplet, give it a descriptive name, add tags as needed, add it to the project, and hit create.
- If you have a domain name that you will be using with this host, then you will want an static/reserved IPv4 address.
Go to the droplet dashboard and click on the “Enable Now” button for
a reserved IP: 
Select IPv4 address, and assign it to a droplet. You do not need it
reserved in the datacenter region. 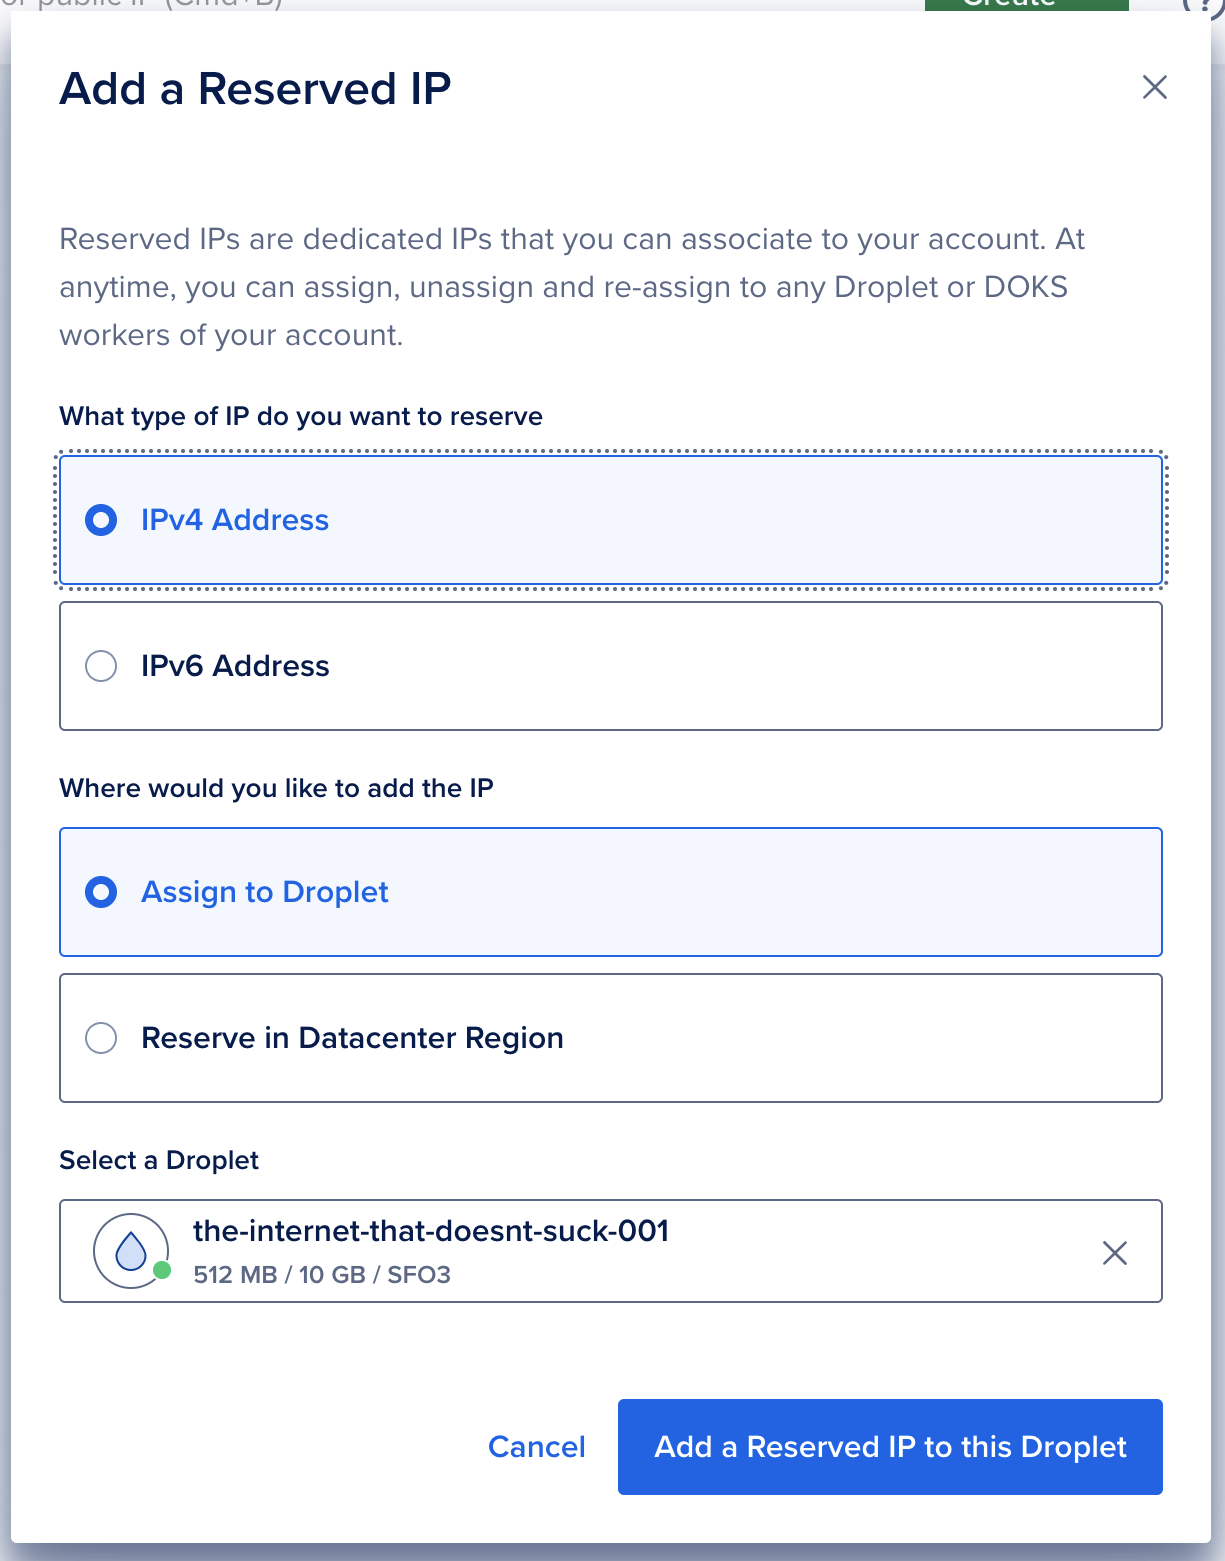
And that’s it! You now have a fully configured virtual server!